Contact:

  • Call LocksmithDVD with questions about locksmith training videos.
  • Call: 209.277.9147
  • Email LocksmithDVD and start your new locksmithing career.
  • Email: LocksmithDVD@Yahoo.com
Sample Image
Sample Image
Sample Image

Video clips from Auto 3

Automotive Locksmithing 3

$ 34.99

Introduction to Automotive Locksmithing 3 – GM Six Cut Locks — (1Hr. 58 Min.)

PLEASE NOTE:

THIS COURSE IN NOT A BEGINNING COURSE — Auto 3, is a continuation of our automotive locksmith training presented in our Auto 1 and Auto 2 courses. It is assumed that viewers of this course have already learned the skills presented in the two earlier courses. One job will pay for the course.

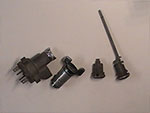
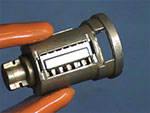
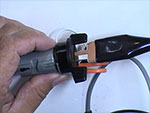
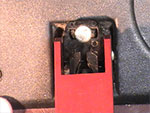
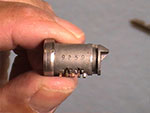
This course will focus on the 6 cut locks which were used by General Motors on the Buick, Cadillac, Chevrolet, Oldsmobile, and Pontiac. With only a few changes, GM used the same basic six cut lock system from 1935 until 2004. There are still millions of cars in use that have these locks. The six cut locks were slowly phased out after the introduction of 10 cut lock in 1994. We will cover 10 cut locks in Auto 4.  Please view the sample video clips.

Category:

This course is divided in 12 parts:

  • Part 1  Tools and Resources

  • Part 2  6 Cut Lock System

  • Part 3  Glove Box Locks

  • Part 4  GM Progression Chart

  • Part 5  GM Door Locks With Codes

  • Part 6  GM Door Locks Without Codes

  • Part 7 Earlier In-Dash Ignition Locks

  • Part 8  GM Steering Columns

  • Part 9  GM Column Mounted Ignition Locks

  • Part 10  VATS

  • Part 11  GM Trunk locks

  • Part 12  Review & Practice

Objectives:

After completing this course you should be able to:

  • 1. Explain the basic features of the GM 6 cut lock system.

  • 2. Explain the best way to make a primary and secondary key for GM 6 cut locks.

  • 3. Remove and decode at least five different GM GB locks.

  • 4. Use a fill program to get the final two cuts for a GM 6 cut key.

  • 5. Make a progression chart and use it to get the final two cuts for a GM 6 cut key.

  • 6. Remove, disassemble and decode and reassemble a GM 6 cut door lock.

  • 7. Remove, disassemble and decode and reassemble a GM 6 cut trunk locks.

  • 8. Explain the basic steps to disassemble and reassemble a round GM steering column.

  • 9. Disassemble, decode, code up and reassemble a GM 6 cut ignition lock.

  • 10. Explain how the VATS system works.

  • 11. Explain how to identify the resistor on a VATS key.

  • 12. Explain the process to make a working key for a VATS system.

Description

This course is divided in 12 parts:

  • Part 1  Tools and Resources

  • Part 2  6 Cut Lock System

  • Part 3  Glove Box Locks

  • Part 4  GM Progression Chart

  • Part 5  GM Door Locks With Codes

  • Part 6  GM Door Locks Without Codes

  • Part 7 Earlier In-Dash Ignition Locks

  • Part 8  GM Steering Columns

  • Part 9  GM Column Mounted Ignition Locks

  • Part 10  VATS

  • Part 11  GM Trunk locks

  • Part 12  Review & Practice

Objectives:

After completing this course you should be able to:

  • 1. Explain the basic features of the GM 6 cut lock system.

  • 2. Explain the best way to make a primary and secondary key for GM 6 cut locks.

  • 3. Remove and decode at least five different GM GB locks.

  • 4. Use a fill program to get the final two cuts for a GM 6 cut key.

  • 5. Make a progression chart and use it to get the final two cuts for a GM 6 cut key.

  • 6. Remove, disassemble and decode and reassemble a GM 6 cut door lock.

  • 7. Remove, disassemble and decode and reassemble a GM 6 cut trunk locks.

  • 8. Explain the basic steps to disassemble and reassemble a round GM steering column.

  • 9. Disassemble, decode, code up and reassemble a GM 6 cut ignition lock.

  • 10. Explain how the VATS system works.

  • 11. Explain how to identify the resistor on a VATS key.

  • 12. Explain the process to make a working key for a VATS system.